WordPress Settings: Complete Guide for Beginners
All product reviews are based on hands-on testing using our internal review methodology. We work directly with product makers to ensure our content is accurate and helpful to readers. Learn more about our marketing service.
WordPress is the most user-friendly CMS but the process of setting it up properly can still feel overwhelming for a beginner.
After installing WordPress on your website, one of the first things you’d need to do is configure the settings of your site. Failure to configure it properly can cause trouble.
For instance, let’s say visitors can register on your site, and unknowingly you have set all new user roles as admin. This means you are giving administrative access to your site to strangers on the internet.
To prevent such disasters, we will show you how to configure your WordPress settings properly.
Let’s get started.
What Are WordPress Settings?
The setting area in a WordPress website allows you to customize your site according to your needs. For instance, you can change the structure of your permalinks or the name of your site from the setting area.
The WordPress settings area can be found on the left-hand menu of your dashboard. If you hover your cursor on the Setting option, it will reveal 6 settings pages. Those are:
- General
- Writing
- Reading
- Discussion
- Media
- Permalinks
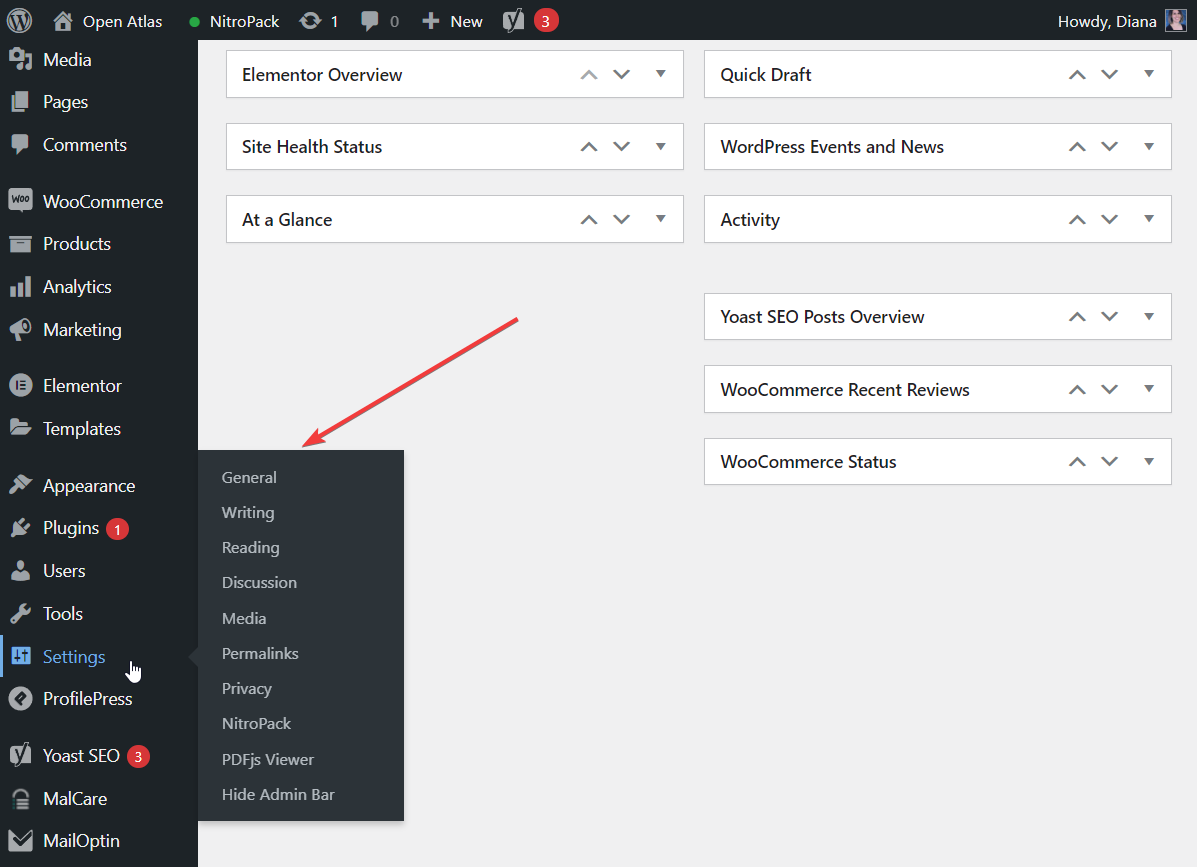
Some of you may find more pages in the setting area. These pages are not default WordPress setting pages. They were added by plugins installed on your site.
On our demo site, the setting area has 4 extra pages that were added by the different plugins installed and activated on our site (see image below).

In this tutorial, we are going to ignore the extra pages and discuss only the 6 default pages found in the settings area.
Let’s dive in.
How to Configure WordPress Settings
WordPress settings have 6 parts: General, Writing, Reading, Discussion, Media, and Permalinks. We are going to walk you through each part so that you can configure your site according to your needs.
General Settings
On this page, you can customize the basic elements of your website, like site name, site URL, time zone, date format, etc. Let’s take a quick look at each of the options.
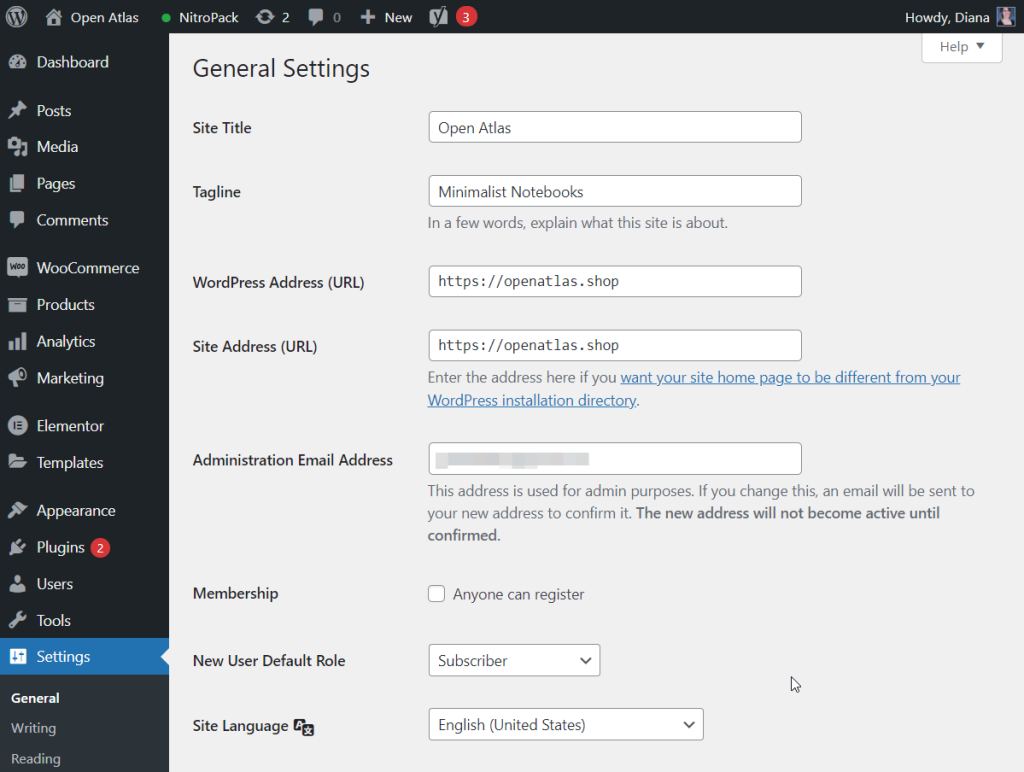
Site Title & Tagline: The site’s title and tagline are the identities of your site and they appear in the title bar of your browser and in the search results.
WordPress Address (URL): The WordPress URL refers to a location that stores the files and folders of your site.
The default location of all WordPress files and folders is the public_html folder. One can access these files and folders via the WordPress URL.
Let’s say your WordPress URL is example.com.
If you move all your files and folders to a new folder called Test then to access the WordPress files and folders, you will need to use this as your WordPress URL – example.com/test.
Site Address (URL): The site URL is the URL of your website, i.e. example.com.
Administration Email Address: In this option, you need to enter your primary email address where you wish to receive admin-related emails.
Membership & New User Default Role: If you want visitors to be able to register to your site, select the Membership checkbox and then assign them a default user role. Needless to say, strangers shouldn’t be made an admin or given editorial roles.
‘Site Language’, ‘Timezone’, ‘Date Format’, ‘Time Format’, and ‘Week Starts On’ options are pretty self-explanatory.
Writing Settings
On the writing page, you can configure settings related to your posts. Let’s take a look at the configuration options.
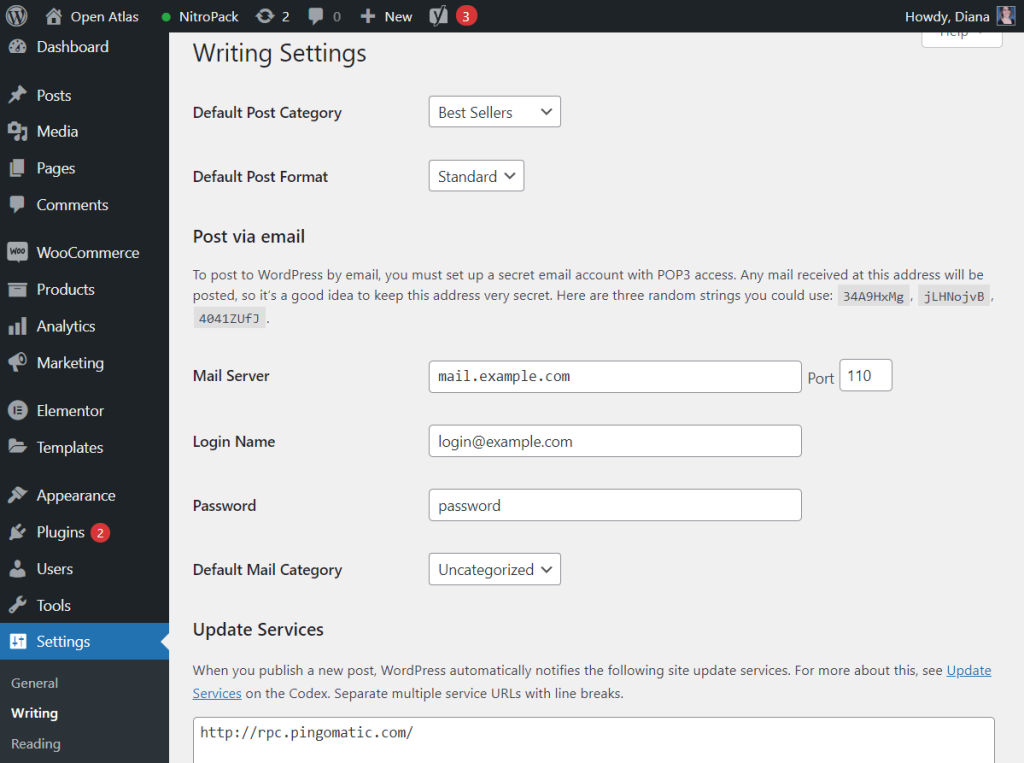
Default Post Category: When you fail to assign any category to an article, the default post category comes into play. WordPress automatically assigns the default post category to the post.
You will notice that WordPress offers only one default post category, i.e. ‘Uncategorized’. To add a different category you need to create a new category.
Default Post Standard: You need to define what type of posts you would like to publish on your site. WordPress supports the following post formats – standard, aside, gallery, link, image, quote, status, video, audio, and chat. Choose the one you would like to use on your WordPress website.
Post via Email: This option allows you to post an article on your site via email. It comes in handy when you can’t access your WordPress dashboard. To enable this option, you will need to follow this guide.
Update Services: Under this option, you can see a box with a Ping-O-Matic URL. Ping-O-Matic is a service that informs search engines when a post is published or updated on your site.
WordPress adds the Ping-O-Matic service by default but you can add more such services in this Updated Services option. Here’s a guide that’ll show you how to add more services to this option.
Reading Settings
The configurations on this page will define how visitors view your website. Let’s look at the different options that the page has to offer.
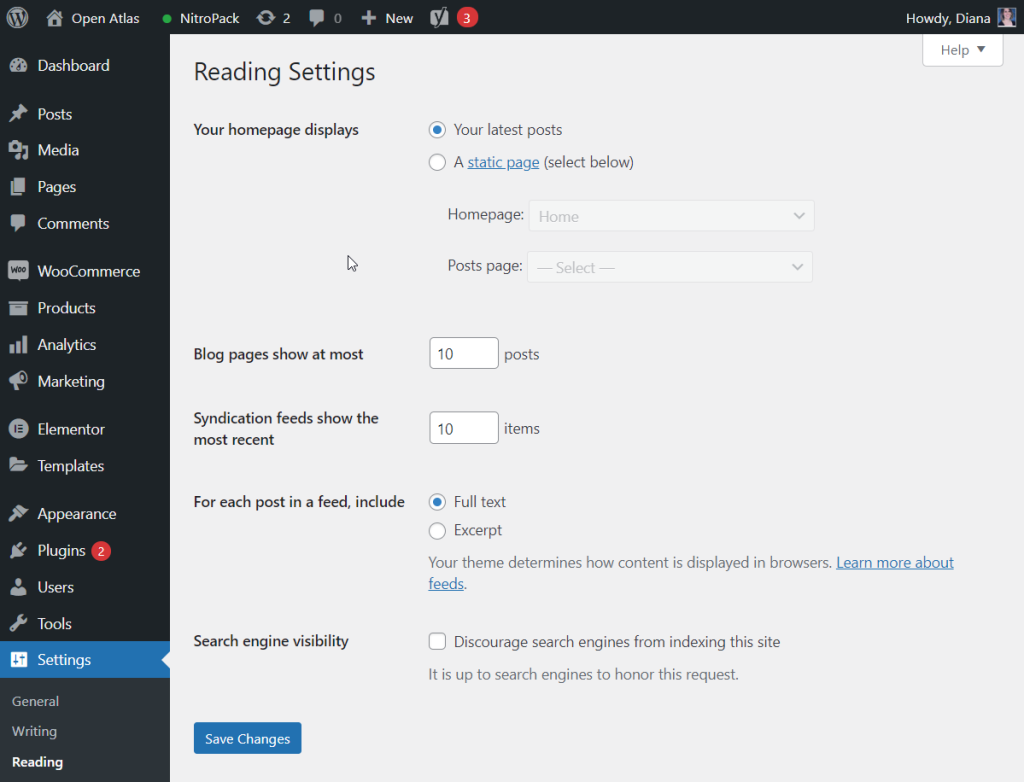
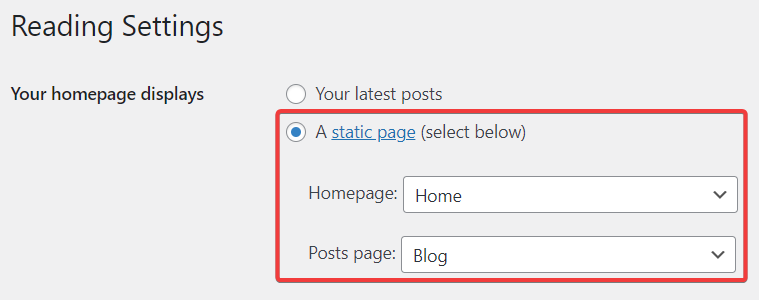
Your Homepage Displays: You can choose to show your latest posts on your home page or on a static page.
If you choose the latter, you will need to create a home page and a blog archive page. Your site’s theme or website builders like Elementor will help you create those pages.
When the pages are live, select the static page option. Then set the homepage and the new archive page as the Posts page.
Syndication Feeds Show the Most Recent: It lets you choose how many posts can be sent out via the RSS feed.
Search Engine Visibility: Make sure this option remains deselected unless you have a good reason to want to prevent your website from appearing on the search engine.
‘Blog Pages Show at Most’ and ‘For Each Post in a Feed, Include’ options are self-explanatory.
Discussion Settings
This particular page allows you to manage how visitors are interacting with your website.
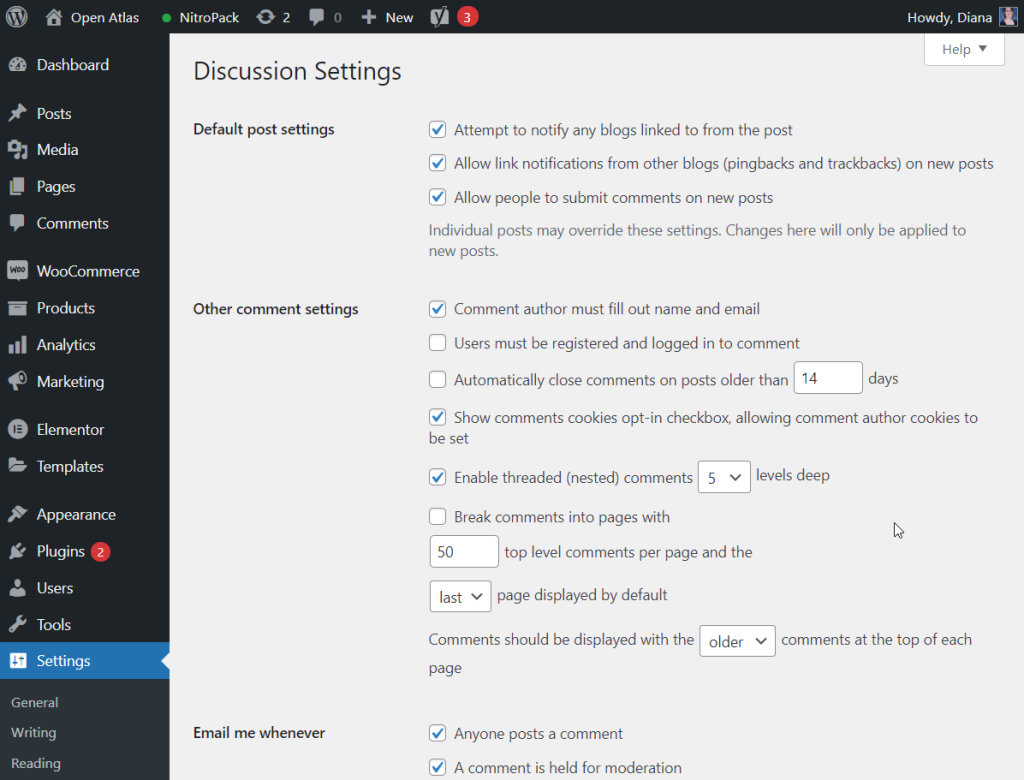
Default Post Settings: There are 3 options in this section. You can keep them all enabled.
Since pingbacks and trackbacks are controversial, we recommend reading this guide to decide whether you want to keep pingbacks and trackbacks enabled.
Other Comment Settings: This particular section offers a number of options that need to be modified according to your needs.
Email Me Whenever: If you want to be notified about comments left on your site, then enable this option.
Before a Comment Appears: Given the number of spam comments websites tend to receive, it’s a good idea to manually approve comments before they are made live on your site.
Comment Moderation: Too many links in a comment is a sign of a spam comment. So using this option, you can hold back comments that have too many links.
You can also blacklist words, IP addresses, or the browser’s user agent string. Comments having these blacklisted elements will be held in the moderation queue and have to be manually approved.
Disallowed Comment Keys: If you don’t want to induct comments in the moderation queue, then use this option. It’ll send the comments straight to the trash.
Avatar Display: You can choose whether you want to display avatars (or profile pictures) from commenters.
Maximum Rating: Since avatars are set by commenters, maximum rating allows you to control what kind of avatar you will allow to be displayed on your site.
Default avatar: In case commenters don’t have an avatar, you can set a default avatar and WordPress will show that when someone without an avatar leaves a comment.
Media Settings
When you upload an image to your website, WordPress automatically creates 3 different sizes (thumbnail, medium, large). Images are resized to ensure that the best image sizes are selected for different locations on your site.
For instance, large images can appear as featured images and thumbnail images can appear on the latest post section.
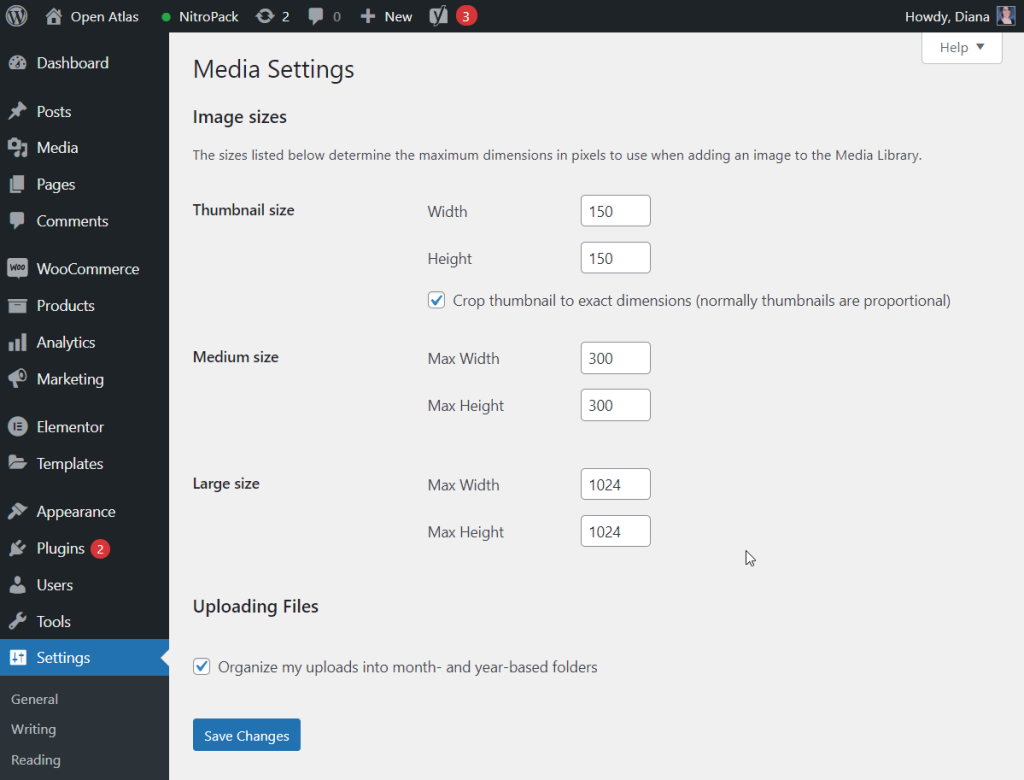
WordPress has a default size for all the different images (thumbnail: 150×150, medium: 300×300, large: 1024×1024) but you can change this size from the media settings page.
As you can see, there are three sizes (thumbnail, medium, and large). WordPress will use the size you a lot to resize all the images uploaded to your site. Here’s a great guide on how to choose the best size options.
Uploading files: You have the option to allow WordPress to organize your media files into months and years.
Permalinks
Permalinks are the URLs that you see on your WordPress posts and pages. There are 6 different types of permalinks: plain, day and name, month and name, numeric, post name, and custom structure. Most of us, use the post name permalink.
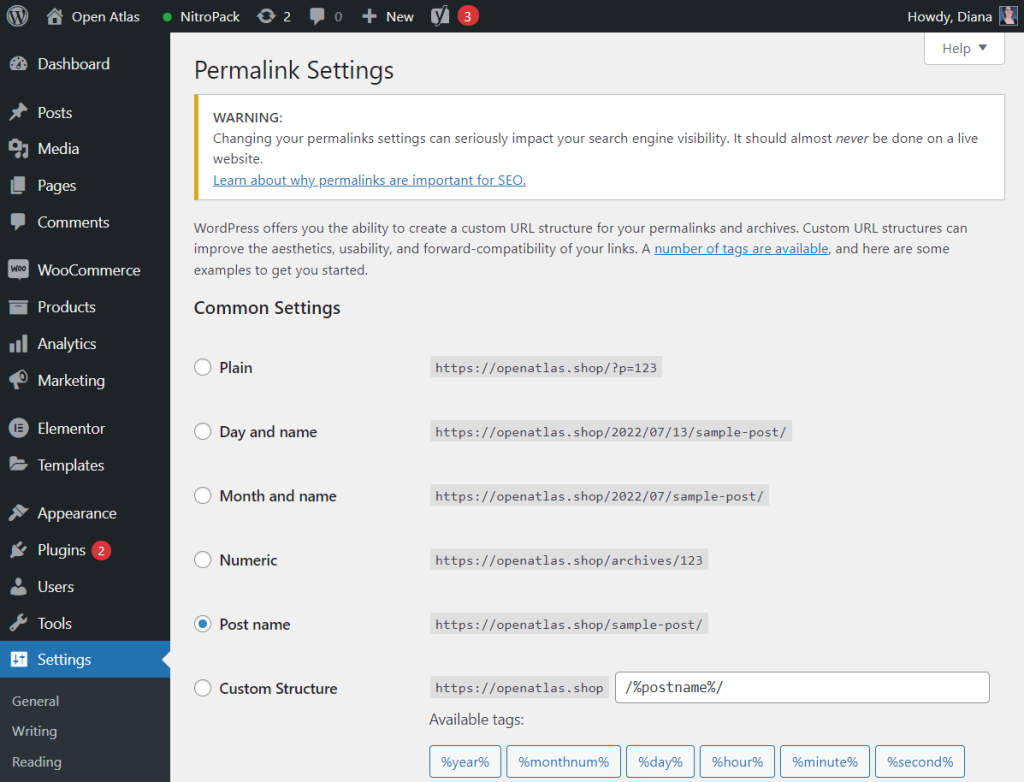
Post Name: WordPress sets ‘plain’ as the default permalink. It adds a random number to the URL which looks ugly and isn’t SEO-friendly. The post name permalink is easy to read and SEO-friendly.
That said, for certain websites like news sites, using the day or month structure makes more sense.
Custom Permalink: If none of the permalink structures meet your need, then create a custom permalink by using the custom structure tags.
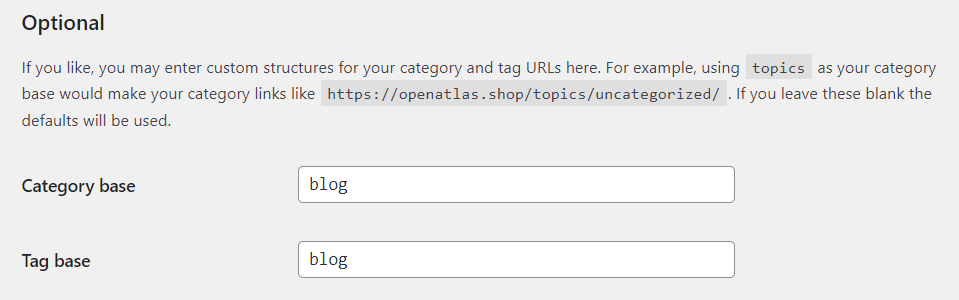
Category and Tag Base: You can set custom URLs to your category and tag archives. The category and tag archive URLs will look like this:
- example.com/category/health
- example.com/tag/health
But you can change the words ‘category’ and ‘tag’ into something like say, ‘blog’ then the URLs will look like this:
- example.com/blog/health
- example.com/blog/health
That is the final WordPress settings page. With that, we have come to the end of this tutorial.
Conclusion
Following a WordPress installation, configuring the settings is the next big step.
Although WordPress is an easy-to-grasp platform, the wealth of settings that need to be carried out can be overwhelming for a beginner.
That said, configuring the settings is not a difficult task. All you need is time to devote and a tutorial to guide you through all the options. We hope our tutorial helped to set up your site properly.
If you have any questions regarding WordPress settings, leave us a comment below.