10+ WordPress Login Security Measures (That Actually Work!)
All product reviews are based on hands-on testing using our internal review methodology. We work directly with product makers to ensure our content is accurate and helpful to readers. Learn more about our marketing service.
Every WordPress site has a login page, and that page is often the first door hackers try to open.
Whether you run a personal blog or a thriving e-commerce store, your login screen is an obvious target.
Attackers can run automated scripts to guess usernames and passwords, flood your site with brute force login attempts, or exploit weak credentials to slip inside.
The good news is that WordPress, as a platform, is secure at its core. The team behind it regularly patches vulnerabilities, enforces modern standards such as SSL, and gives developers the flexibility to harden sites even further.
But while WordPress itself is solid, your login page is only as strong as the measures you put in place.
Out of the box, WordPress doesn’t limit login attempts, and it uses a default login URL that every hacker already knows. That makes the login screen one of the easiest ways into your site if you leave it unprotected.
That’s why focusing on WordPress login security is essential.
In this guide, we’ll walk through the best practices for securing your WordPress login page.
Some are quick wins, while others are more advanced, but together they’ll give you a layered defense that keeps your site and your visitors’ data safe.
Does WordPress Have Good Security?
WordPress is built on solid code and maintained by a dedicated security team that constantly monitors vulnerabilities and pushes out updates. When used correctly, WordPress can be just as secure as any other content management system.
The real challenge comes from how WordPress sites are set up and maintained. Because it is the most popular CMS in the world, it is also the biggest target for hackers.
Automated bots crawl the web looking for WordPress sites with weak passwords, outdated plugins, or poorly configured settings. In most cases, it is not the WordPress core that is exploited, but the login page, plugins, themes, or lax user practices.
Login security, in particular, is a weak spot. By default, the WordPress login page is always located at the same URL (/wp-admin or /wp-login.php). Attackers know exactly where to look, and since WordPress does not limit login attempts by default, bots can try thousands of password combinations in minutes. Even if the rest of your site is well protected, a single compromised login can hand control of the entire site to an attacker.
So while WordPress does provide strong security foundations, it is up to each site owner to harden the login process. This means enforcing strong credentials, adding extra authentication steps, and installing the right security tools. Treating your login page as the front door of your website is the best way to keep hackers out.
How to Secure WordPress Login (Best Practices)
Securing your login page is one of the most effective ways to protect your entire WordPress site. Here are the key steps you should take.
Start With Strong Credentials
Your username and password are the first defense against hackers.
Weak credentials like admin or password123 make it easy for bots to break in with brute force attacks.
Always choose a unique username and a strong password of at least 12 characters with uppercase and lowercase letters, numbers, and symbols
Avoid personal details, dictionary words, or simple patterns
Use a password manager such as Bitwarden, LastPass, or 1Password to generate and store secure passwords.

Pro Tip: Update your credentials regularly, especially for admin accounts, and never reuse the same password across multiple websites. Treat your username with the same care as your password.
Change Your Default Login URL
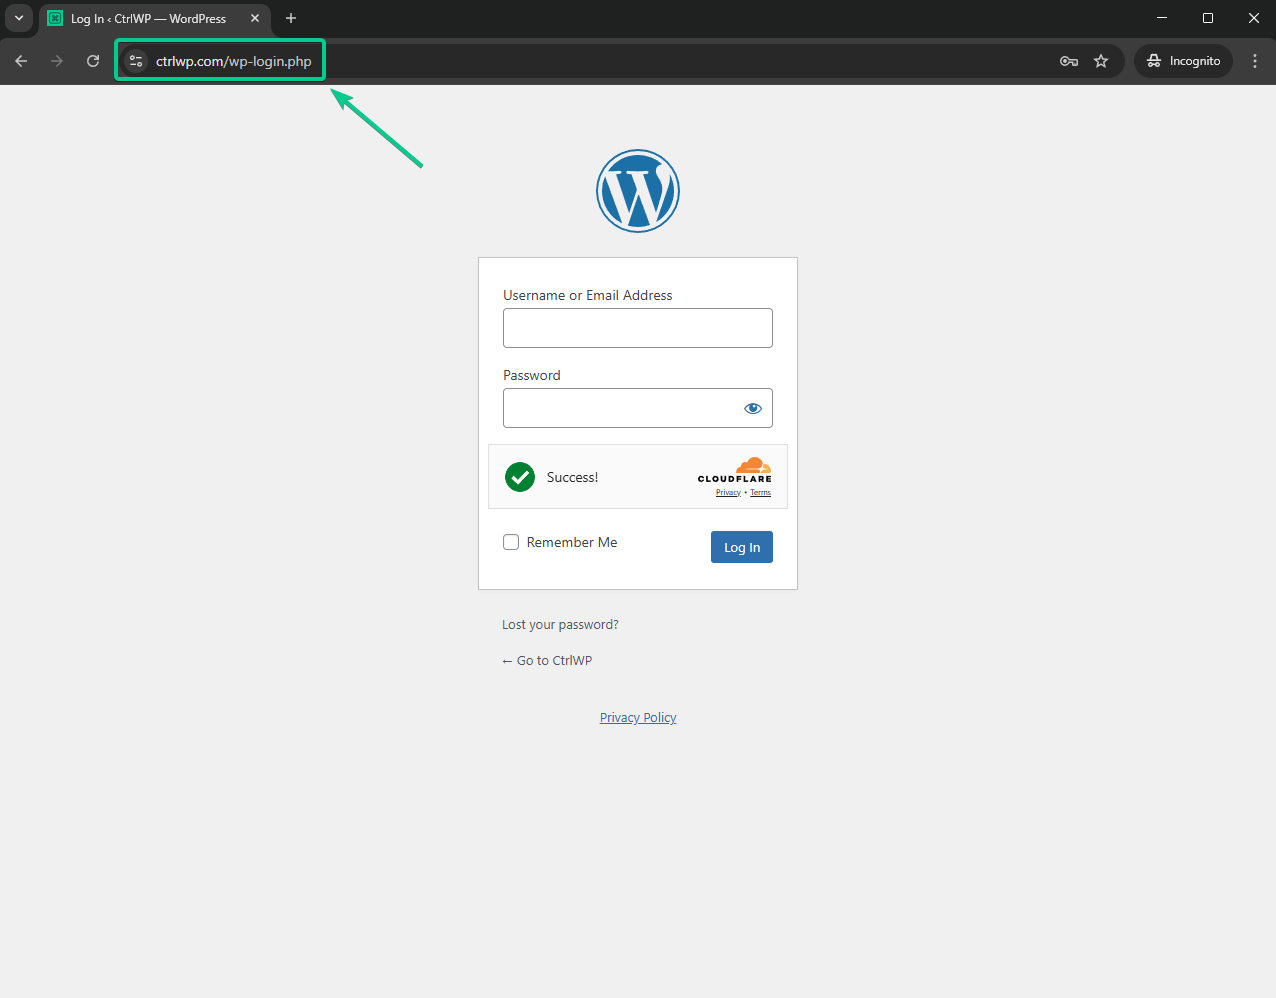
By default, every WordPress login page is found at /wp-admin or /wp-login.php, which makes it easy for hackers to find and target.
Changing the login URL adds a simple but effective layer of protection.
For example, yourwebsite.com/myportal is harder for bots to guess. Anyone trying the old URL will see an error or a redirect.
The easiest way to do this is with plugins like WPS Hide Login, iThemes Security, or Protect Your WP Admin.
This quick change hides your login page from automated scripts and makes brute force attempts less likely to succeed.
Add Two-Factor Authentication (2FA)
Two-Factor Authentication (2FA) makes logins much stronger by requiring both a password and a temporary code from a trusted device. Even if your password is stolen, attackers cannot log in without this second factor.
WordPress plugins like WP 2FA, miniOrange, MalCare, and Wordfence Security make it easy to add 2FA to your site. You can enforce it for all users or just administrators.
Always set up backup codes in case you lose access to your device.
Adding 2FA significantly reduces the risk of brute force attacks and stolen credentials, making your login page far more secure.
Limit Failed Login Attempts
WordPress does not limit login attempts by default, which allows bots to try endless password combinations. This creates opportunities for brute force attacks and can even overload your server.
Limiting failed login attempts stops this by temporarily locking out users after a set number of failed tries.
Plugins like Limit Login Attempts Reloaded, Login LockDown, or iThemes Security make it simple to configure retries, lockout periods, and alerts.
By restricting attempts, you prevent attackers from endlessly guessing passwords and protect your site’s performance. This safeguard makes brute force attacks much harder without inconveniencing genuine users.
Hide or Protect Your Username
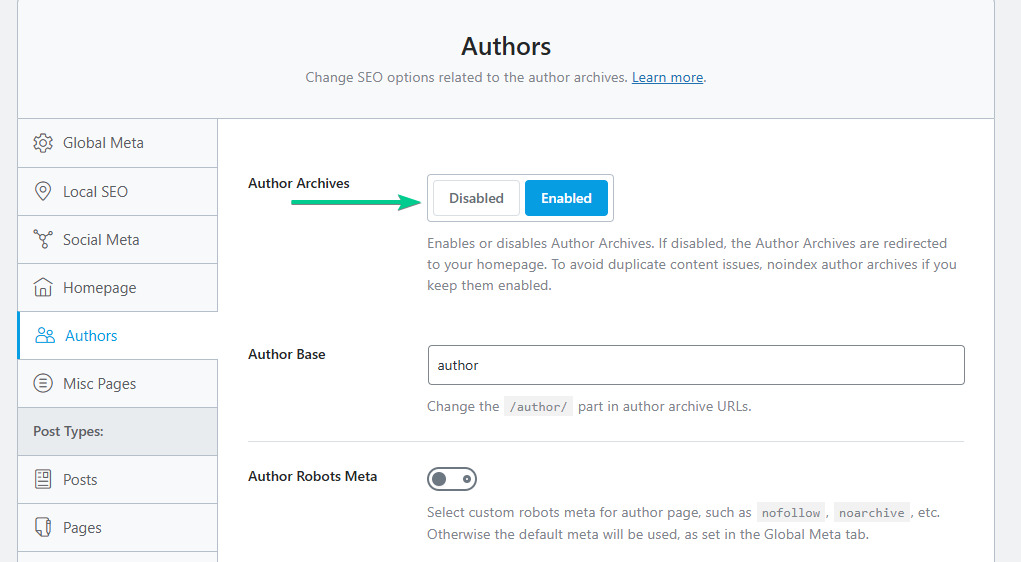
Hackers only need two things to break in: your username and your password. WordPress often makes usernames public by showing them as author names on posts. To prevent this, change your display name in Users → Profile so it differs from your login name. Set a nickname if needed, then use that publicly.
You can also disable author archives with a plugin like Yoast SEO or redirect profile pages to hide usernames from bots.
Treat your username as private information. Keeping it unique and hidden reduces the risk of attackers combining it with brute force password attempts.
Disable Login Hints
When login details are entered incorrectly, WordPress shows error messages like “Invalid username” or “Incorrect password.” These hints help real users but also reveal useful information to attackers. A hacker who learns that a username is valid only needs to focus on the password.
Disabling login hints removes this advantage by replacing detailed messages with a generic “Login details are incorrect.”
You can achieve this by adding this small code snippet to your functions.php file:
function no_wordpress_errors(){

  return 'Something is wrong!';

}

add_filter( 'login_errors', 'no_wordpress_errors' );
This code changes the default login hint to a custom message, such as ‘Something is wrong!’.
We recommend using plugins like Code Snippets and WPCode to edit your site’s functions.php file.
This minor adjustment reduces information leaks and makes brute force or credential-stuffing attacks far less effective.
Take a look at this video tutorial:
Add CAPTCHA or Security Questions
Automated bots carry out most brute force attacks. CAPTCHA challenges and security questions are effective tools to stop them.
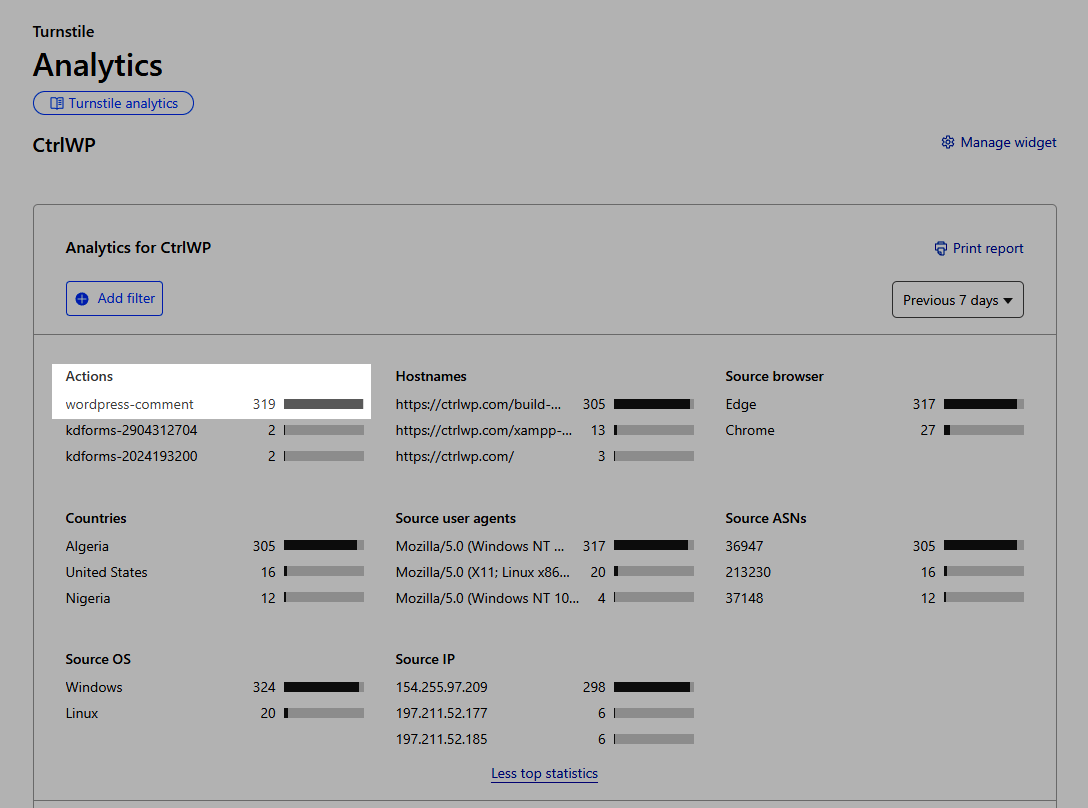
CAPTCHA tools like Google reCAPTCHA or Simple CAPTCHA Alternative force users to prove they are human before logging in. For example, on our own site, CtrlWP, we once received more than 300 spam comments in just 10 days.
Implementing Simple CAPTCHA Alternative with Cloudflare Turnstile instantly stopped hundreds of spam submissions and login attempts.
Alternatively, adding security questions provides another verification step, especially useful for membership or multi-user sites. Plugins such as Login No Captcha reCAPTCHA, Login Security Captcha, or WP Security Questions make this setup easy.
By requiring users to complete a quick challenge or answer a personal question, you block bots from flooding your login page with endless attempts.
Use Auto Logout for Idle Sessions
Unattended sessions can expose your site to risk if someone gains access to a logged-in account.
By default, WordPress keeps users logged in for 48 hours or up to two weeks if “Remember Me” is checked.
To reduce this risk, set up automatic logout after inactivity. Plugins like Inactive Logout or WPForce Logout let you define time limits and even show a warning before ending the session. This ensures accounts do not stay open on shared or public devices.
Enforcing auto logout helps prevent unauthorized activity, especially on sites with multiple users or sensitive data.
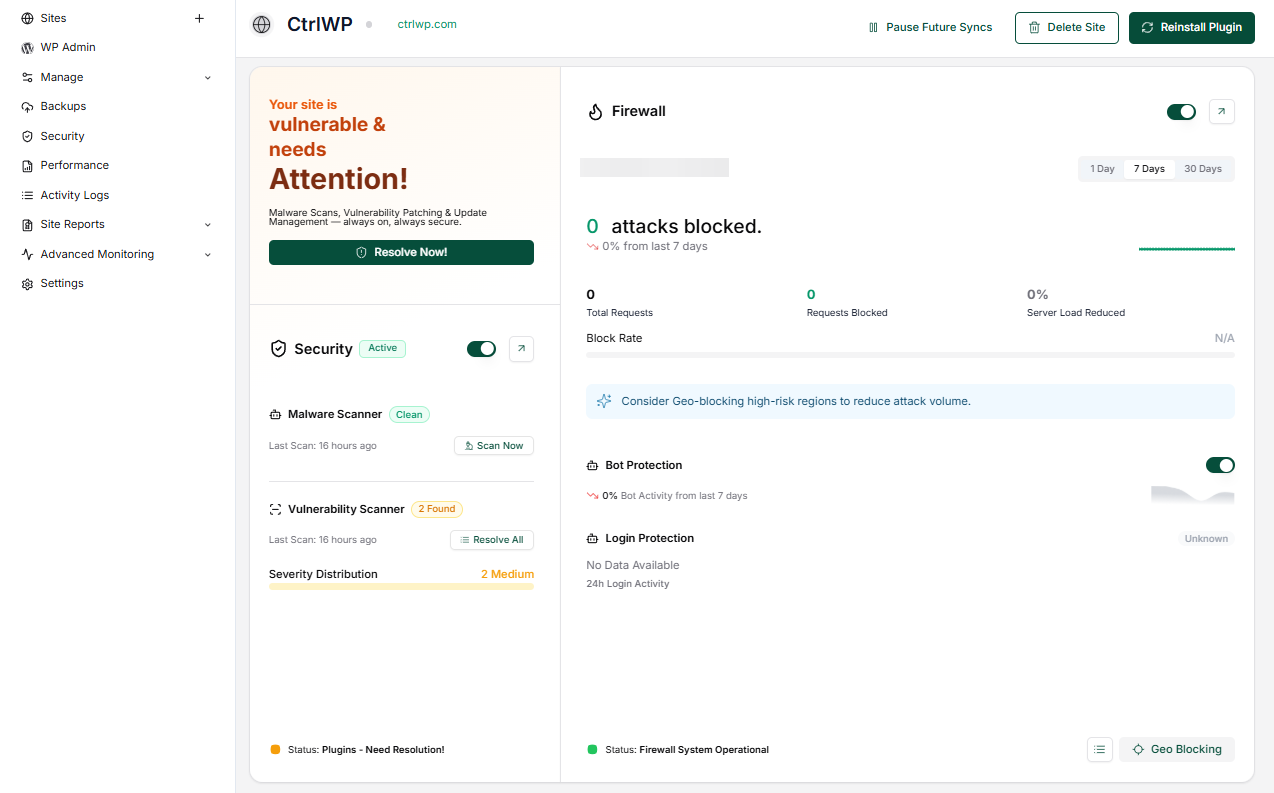
Install a Security Plugin
A comprehensive security plugin brings multiple protections together in one tool.
Beyond login security, these plugins often provide firewalls, malware scanning, IP blocking, and activity monitoring.
Popular options include MalCare, Wordfence, All-In-One Security (AIOS), Sucuri, and iThemes Security. Most have free versions with essential protections and premium upgrades for advanced features.
Installing one well-chosen plugin is usually enough since running several can create conflicts.
With the right security plugin, you can automate best practices and strengthen your WordPress login against a wide range of attacks.
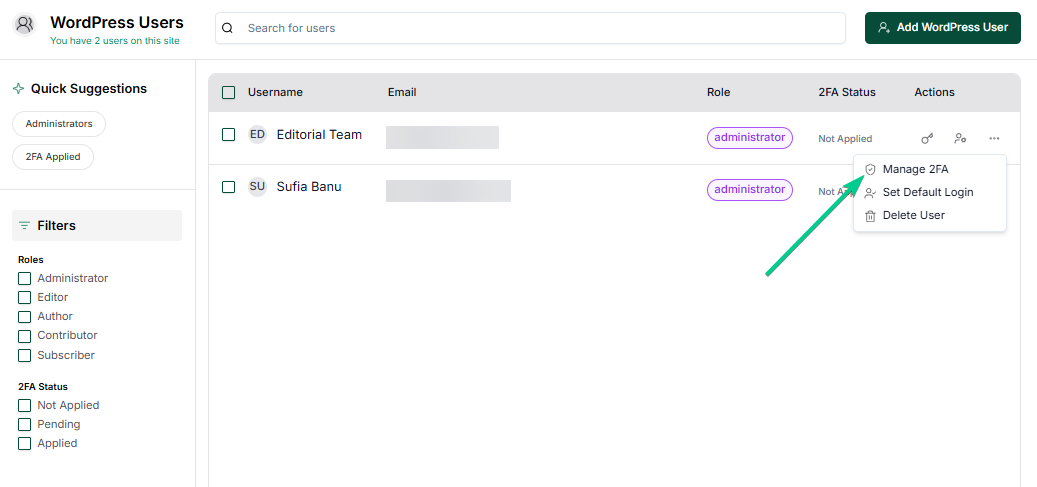
Review & Manage User Accounts
Every account is a potential entry point, so review your user list regularly.
Remove old accounts, delete suspicious profiles, and make sure no one has more privileges than necessary. For example, only trusted people should have administrator roles, while most contributors should have limited permissions.
Security plugins can enforce strong passwords and 2FA for users with high access. Regular monitoring ensures hackers cannot exploit forgotten accounts or weak credentials.
By actively managing users, you reduce vulnerabilities and make your WordPress login system safer and more controlled.
Keep WordPress Core, Plugins, & Themes Updated
Outdated software is a frequent cause of hacks. Updates to WordPress core, plugins, and themes often include security fixes for known vulnerabilities.
If you delay updates, attackers can exploit these weaknesses to bypass login protections.
Always keep WordPress up to date, enable automatic updates for minor releases, and apply major updates after making a backup.
Update plugins and themes as soon as possible, and remove those you no longer use. Even inactive software can still be a security risk.
Staying current ensures your site benefits from the latest protections and strengthens every other login security measure.
Advanced Steps (Optional)
If you want to take login security further, consider advanced methods.
- IP whitelisting restricts access so only specific addresses can log in, useful for small teams working from fixed locations.
- Geo-blocking prevents login attempts from countries where you do not expect traffic. Restricting login times allows access only during chosen hours.
- Another option is disabling XML-RPC if you do not use services that depend on it, since attackers often exploit it for brute force attacks.
- Also, consider adding password protection at the server level, which creates a double barrier before users can even reach your WordPress login form. This means anyone visiting /wp-admin will first need to enter separate credentials. This measure is especially valuable for small teams, sensitive websites, or admin-only environments where access is tightly controlled. You will need to talk to your hosting support to add this type of protection to your website.
These advanced measures add extra barriers and are especially valuable for e-commerce sites, membership platforms, or any site handling sensitive data.
FAQs
Is WordPress vulnerable?
Yes, WordPress is vulnerable, but not because the core software is weak. The platform is secure when updated regularly. Vulnerabilities usually come from outdated plugins, themes, weak login practices, or poor hosting. Since WordPress is the most popular CMS, it is a constant target, making proactive security measures essential.
Does WordPress have built-in security?
WordPress includes several built-in security features, such as password strength checks, SSL support, automatic updates for minor releases, and a dedicated security team monitoring vulnerabilities. However, these protections are not enough on their own. To fully secure your site, you must add stronger login measures, configure settings properly, and use reliable plugins for extra defense.
Does WordPress track logins?
By default, WordPress does not track detailed login activity beyond showing who is currently logged in. If you want full records of login attempts, failed logins, or user activity, you need to install a security or activity log plugin such as Wordfence or WP Activity Log. These tools provide monitoring and alerts for suspicious login behavior.
Conclusion
Your WordPress login page is the first and most obvious target for hackers. If it is left unprotected, even a strong website can be brought down by brute force attacks or stolen credentials.
The good news is that you do not need to be a developer to secure it. Simple steps like using strong passwords, changing the default login URL, and enabling two-factor authentication can dramatically reduce your risk. Adding extra measures such as limiting login attempts, disabling login hints, or installing a reliable security plugin strengthens your defenses even further.
For larger or more sensitive sites, advanced steps like IP restrictions, geo-blocking, or disabling XML-RPC provide even more control.
Remember that security is not a one-time task but an ongoing process.
By combining these practices and keeping WordPress up to date, you ensure your login page remains locked down and your website stays safe.
If you have any questions about WordPress login security, let us know in the comments section below.